![]()
|
Autopilot unit and
parts The autopilot unit is from Jefa (DU-DD1*) and the same goes for the arm links and the steering column. Each issue with the autopilot is described under the respective picture.
*More
information is to be found under the Manual section. |
|
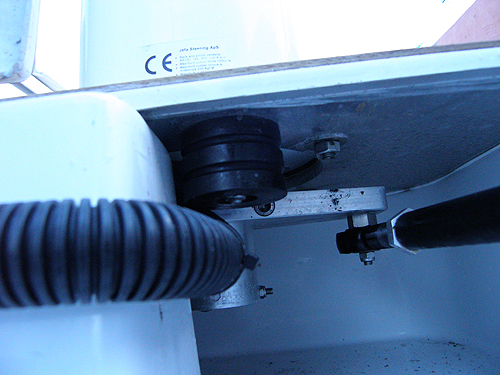
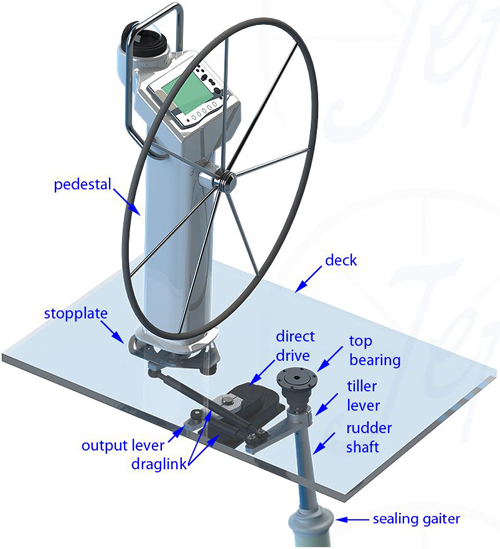
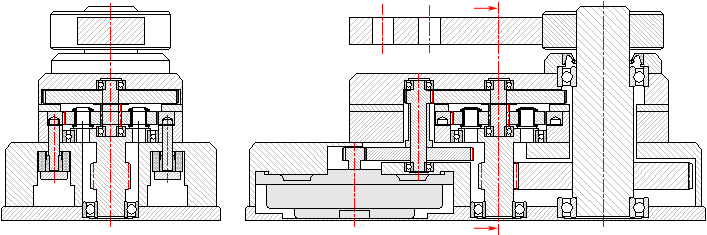
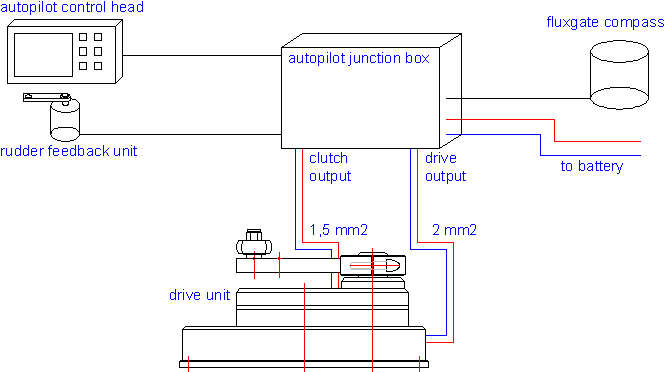
1.The top view of
the autopilot unit to the left, the rudder in the middle and the
Simrad "sensor" to the right. We will now focus on the area
under the steering column, where the left link arm goes underneath. |
2.Here you can se the arm is connected to a lever which is connected by a shaft to the steering wheel. In front of the lever you find the bumper. |
|
|
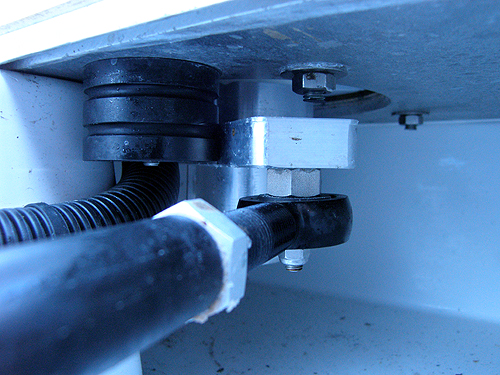
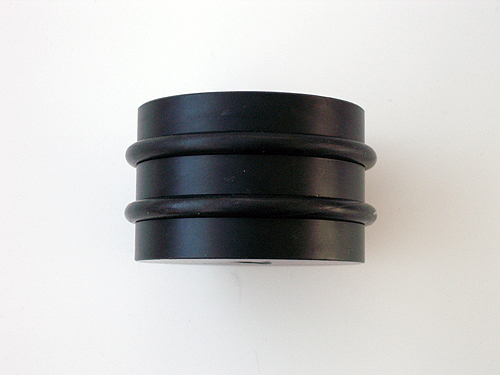
3.The bumbers job
is to reduce the forces from the lever and dampen the impact
when turning the rudder fully to starboard. Here you can see that
there are no O-rings in the grooves of the bumper. We like to
give a word of warning here: Do not remove the bumper from its
place!! More about it later on as you scroll down. As you can
see the tiller arm only hits the lover O-ring which pretty much
makes the upper one to a spare part. |
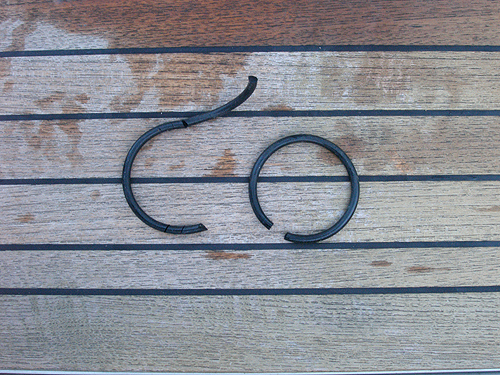
4. The O-rings were found in the bottom of the autopilot compartment when we started to prepare the boat in spring 2011. Obviously the rubber is not the best quality as it had cracked during the winter. As said in picture 3 the upper O-ring works only as a spare part and still it was broken! |
|
|
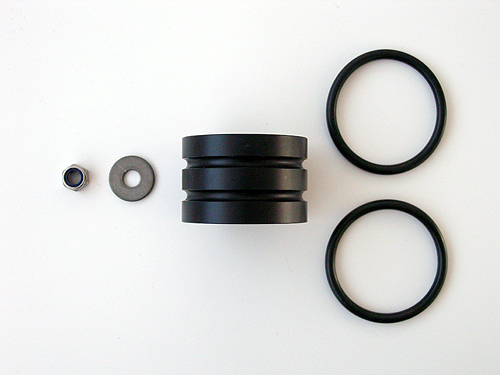
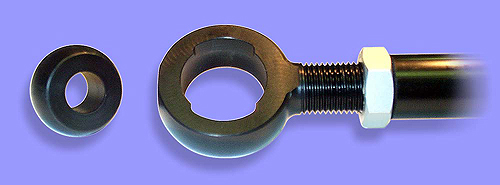
5. Here is the bumper removed from the boat and you can see here that there is no bolt, only a washer and a nylok nut plus two new O-rings. |
6. Use good industrial quality O-rings made of nitrite rubber and you will have long lasting O-rings. Don't forget some spare ones that you greased with silicone grease and store wrapped in a glad pack. |
|
|
7.About removing
the bumper and why you actually must NOT do it! |
||
|
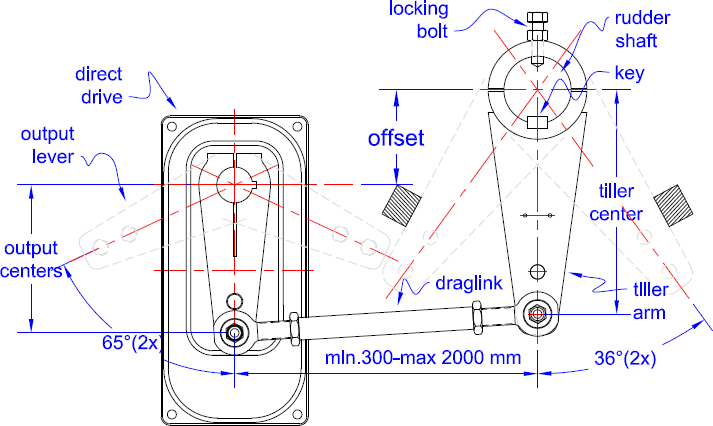
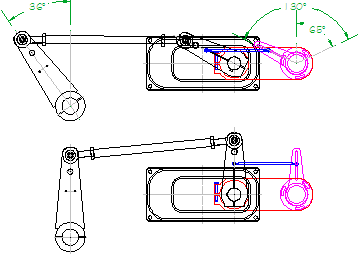
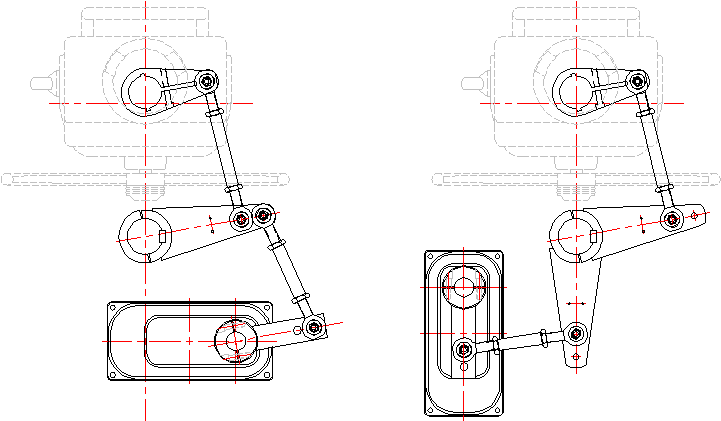
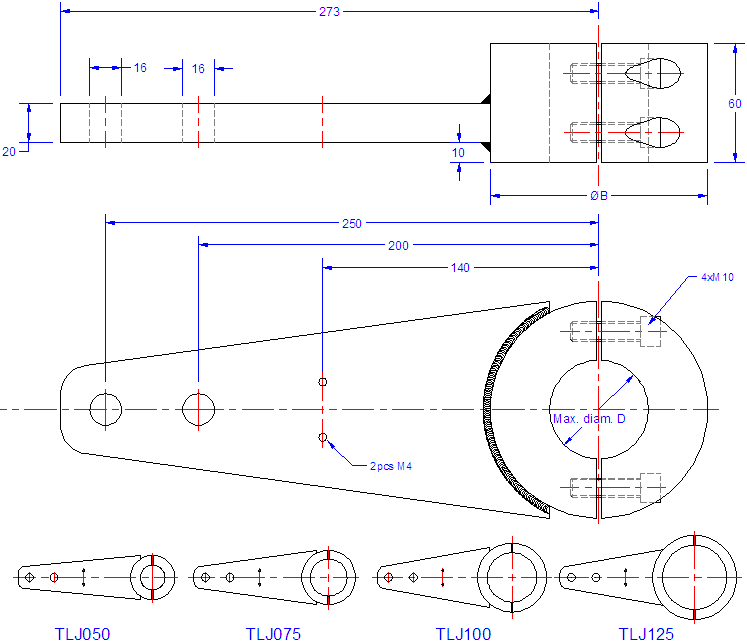
Various drawings. All credits belong to Jefa!
|
||
|
|
|
|
|
|
 |
|
|
|
 |
|
|
 |
|
 |
||