|
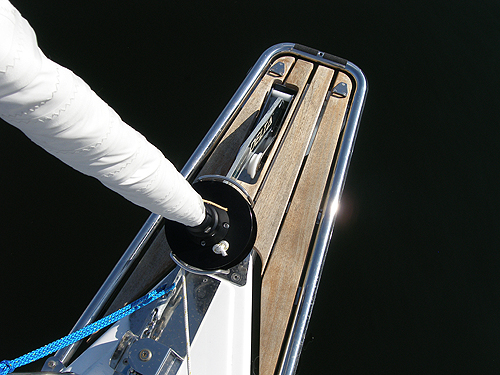
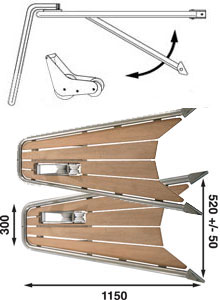
Bowsprit For the Scandinavian market Hanse started to install bowsprits at the shipyard. They are supplied by Båtsystem AB of Sweden. Since the anchor/chain roll is now installed in the bowsprit the huge steel construction that was on the older boats has been removed. They have also installed a vertical chain roll on the deck.
|
|
1. Bowsprit from the right side.
|
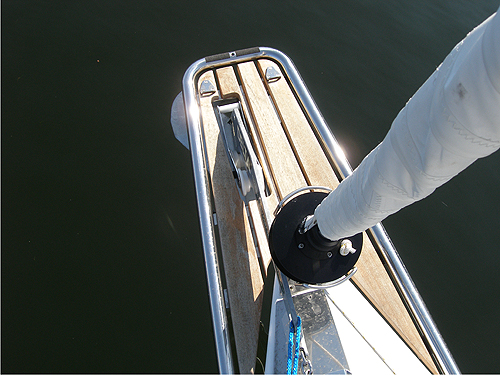 2. Bowsprit from the left side. |
|
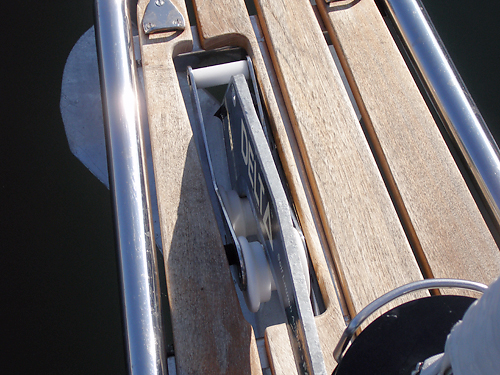 3. Close up of the anchor roller. |
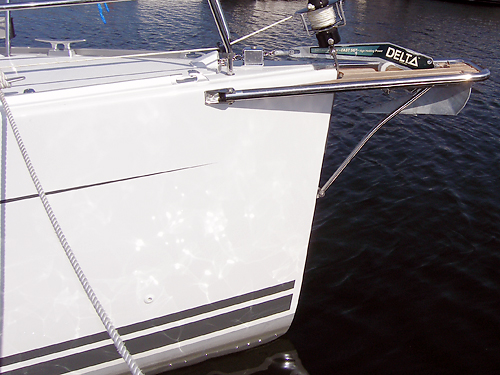 4. Bowsprit from the side. You have to be very carefull with the windlass, otherwise it could bend the supporting strut. If we only had known that from the start.
|
|
|
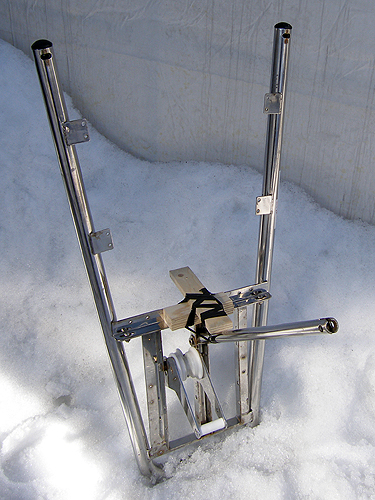
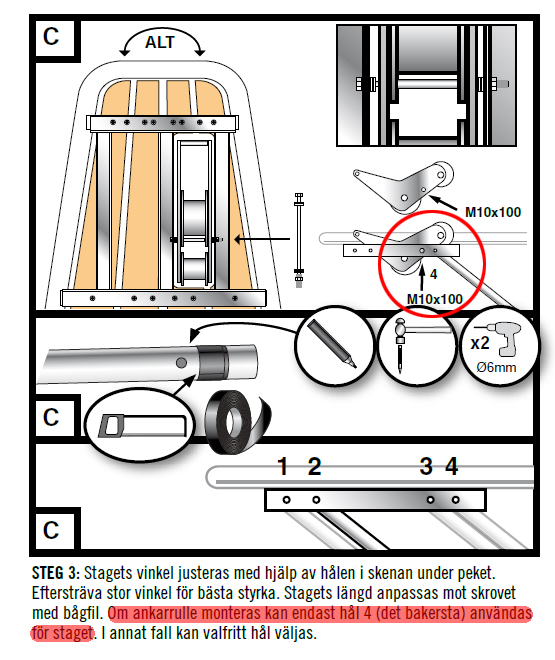
5. News March 2010: During the Stockholm boat show I asked Båtsystem why
their design was so stupid as the anchor could damage the supporting
strut. I was told that it should not if it is installed correctly. So I
got my hands on the installation manual and it clearly states that if
you have the anchor/chain roll in the bowsprit, you have to use position
4, not 1 as shown above. So in picture the strut marked as #4 should be installed under the letter "D" in Delta on the anchor. After pressing the issue the shipyard delivered and installed a new supporting strut.
|
||
 Pictures by courtesy of Båtsystem AB |
 Pictures by courtesy of Båtsystem AB |
|
|
New supporting strut
(Bobstay) for
the bowsprit (April 2013) We had bought a Code Zero in 2012 and realized the side powers the bowsprit was exposed to. We wanted to be sure that the bowsprit would not bend. We also wanted to get rid of the wiggling the bowsprit did when I stood on one or the other side of it. The design should be slim, withstand the forces of the Code Zero and still allow us to use some kind of bow anchor. We had some help from Idelfix Too, a fellow member of the MyHanse forum (www.myhanse.com), who is a blacksmith and the result is shown below.
|
||
|
1. We started with stripping of all the teak boards off the bowsprit as it would be much easier and lighter to remove. |
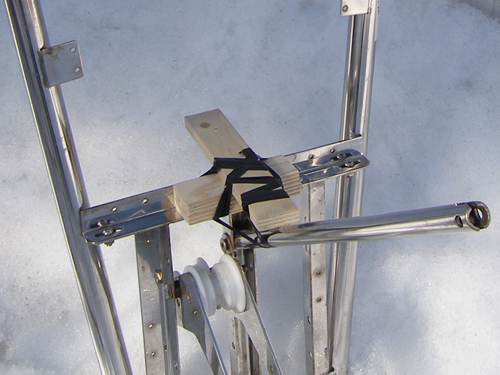 2. Before we removed the bowsprit we attached some pieces of plywood to it so we could lock the supporting strut and by that show the correct angle (and length).
|
|
|
3. The naked bow with the cutwater that we had installed earlier.
|
4. Just an other angle of the bow. |
|
|
5. This is what the bowsprit looks like when we had removed it and locked the supporting strut. |
6. As the blacksmith now had all the measurments he needed he cut off the bottom part of the old supporting strut and reused it as it already fitted perfectly to its counter part on the cutwater in the bow. To this he welded a V-shaped strut that was attached to the bowsprit with bolts.
|
|
|
7. The bowsprit and the new supporting strut fitted back on the bow. The 16 kg Bruce-anchor fits quite nicely between the legs of the V but was little bit too tight which made the handling little bit difficult.
|
8. Front view. To avoid the anchor scrapping the strut we had to add some plastic where the anchor meets the stailness steel tube. |
|
|
9. Close up of the details. |
10. Here you can see we welded some small brackets to the bowsprit so the upper part of the supporting strut could be attached to it. As you never know what can happend with the bow we wanted to be sure that we can easily remove and replace damaged parts.
|
|
|
11. Close up of the fitting.
|
12. Different angle with the anchor on. |
|
|
13. Here you can see the both attachment points for the strut. |
14. The bowsprit without the anchor.
|
|
|
15. Front view. |
16. Close up. |
|
|
Material:
Stainless steel. Design: Marco Christensen and Ulf Suhr Manufactured by Nyströms Plåt, Ulf Suhr |
||

