![]()
|
Lounge bench extension When we spend time in the saloon watching films on the PC, we do lying down. Unfortunately the saloon lounge is too short for me to lay comfortably. It took me a while to find out a solution that would not only support my legs cross the passage way in the saloon and also convert the lounge into a bed (a narrow one) when required. As for material I used one on my old floorboards from the front cabin and my favorite black smith Idelfix Too (fellow member from MyHanse forum) helped me to make the stainless steel brackets.
|
|
 1. A piece of stainless steel was cut , folded and the corners and edges were ground round and smooth.
|
|
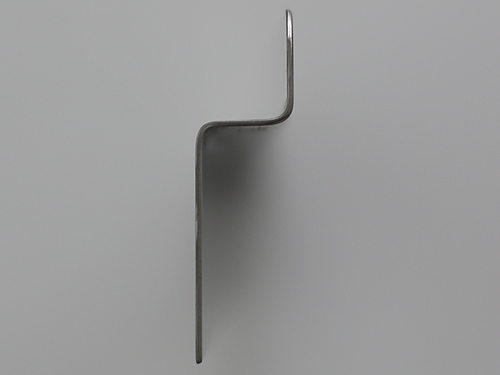 2. The profile from the end.
|
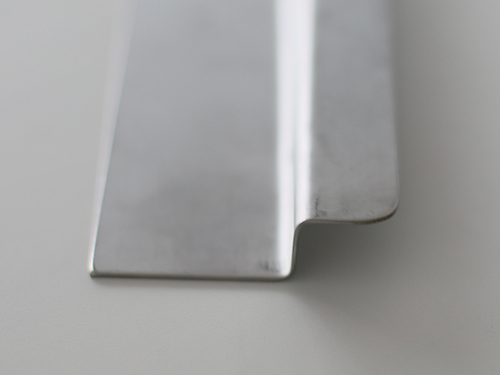 3. Another angle of the profile that shows the longer section which will be attached to the board and the shorter section with rounded corners that will rest on the bench structure underneath the cushions.
|
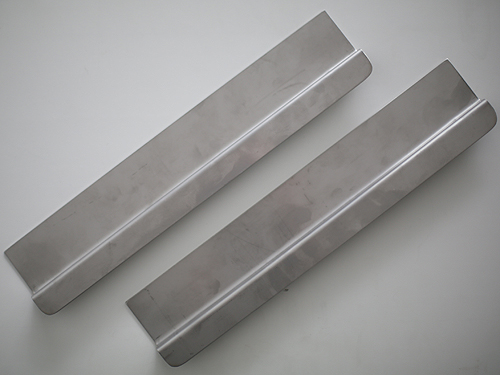 4. Two pieces were manufactured.
|
|
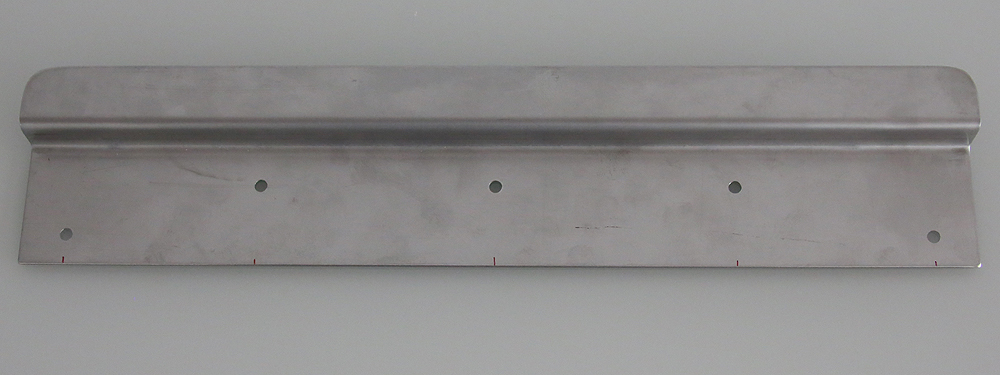 5. Holes were drilled in this pattern in order to spread the forces and to avoid splitting the timber.
|
|
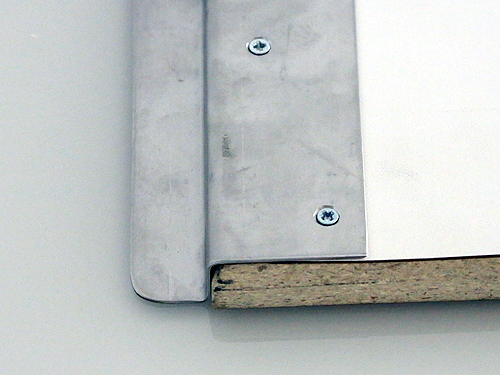
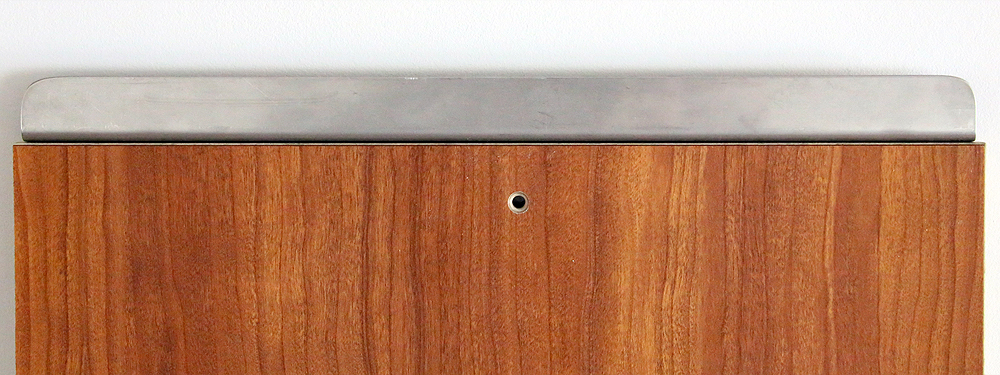
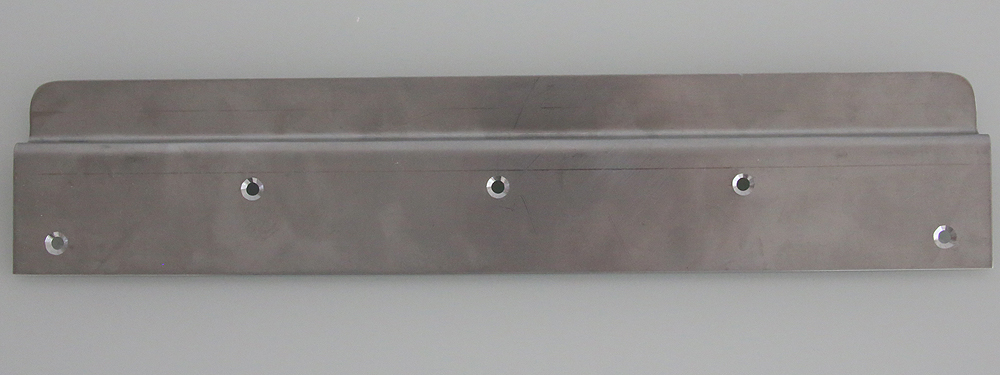 6. The holes were countersunk.
|
|
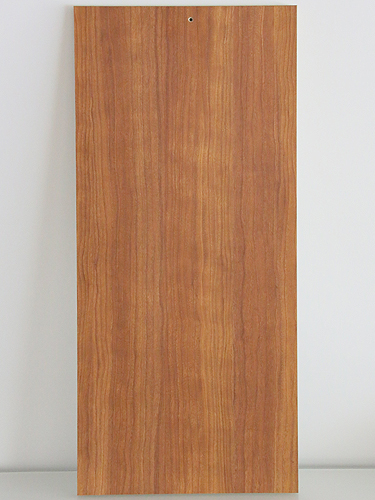 7. The board was cut out. The hole on top of the board was there already from it's previous life as a floor board. There is no reason to have it otherwise.
|
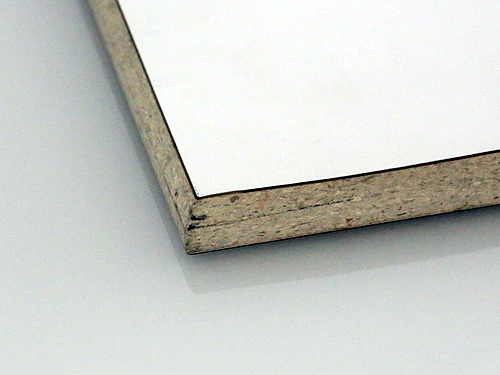 8. The edges of the board were routed to fit the metal bracket plus to avoid sharp edges that could damage hands or the interior.
|
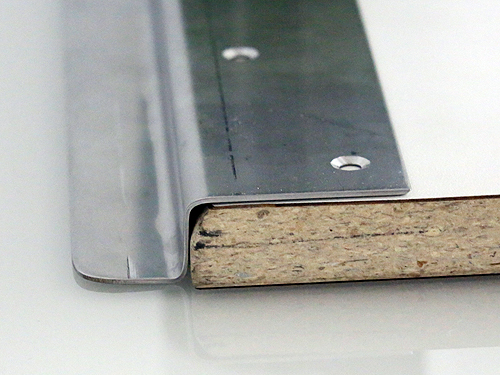 9. Testing that the board was routed enough to fit the stainless steel bracket.
|
 10. Screws in place on the underside of the board. |
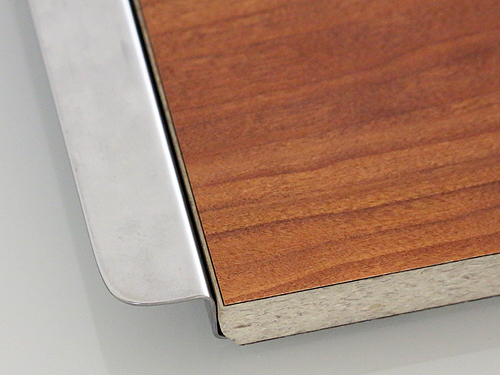 11. The upper surface of the board and the stainless steel bracket are level.
|
|
 12. This is the bracket and board viewed from the top.
|
|
 13. And this is how it looks from the underside.
|
|
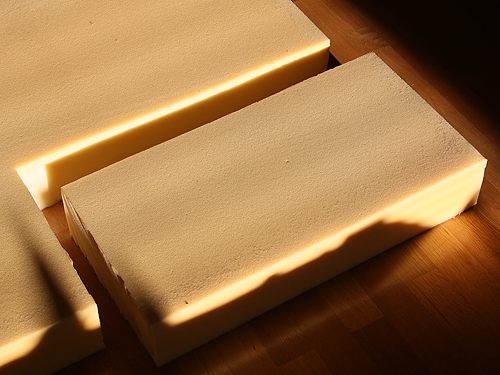
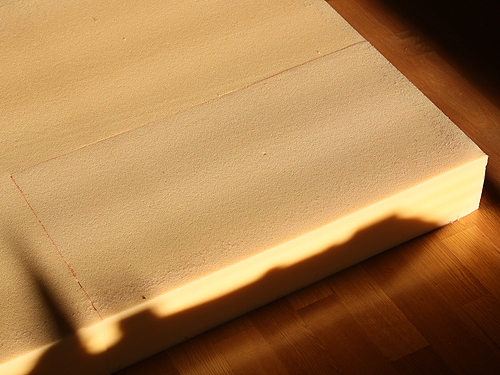 14. Time to make the cushion. We cut out a piece of foam to similar measurements as the board (see point 17 below) and the same thickness as the existing cushion in the saloon.
|
 15. Foam ready to be covered with cloth. |
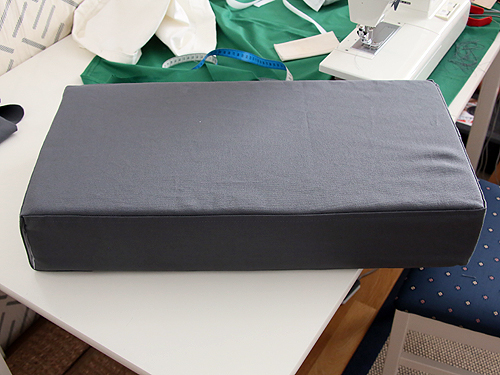 16. The cushion cover is finished and fitted to the foam.
|
 17. The cushion is slightly narrower than the board because the existing cushions extend slightly outside their base. We measured the new cushion to be a tight fit so it would be kept in place.
|
 18. The board on its' place under the existing cushions and close to the galley. The board was measured in a way that it fits on the both ends of the saloon so measure where it is the narrowest.
|
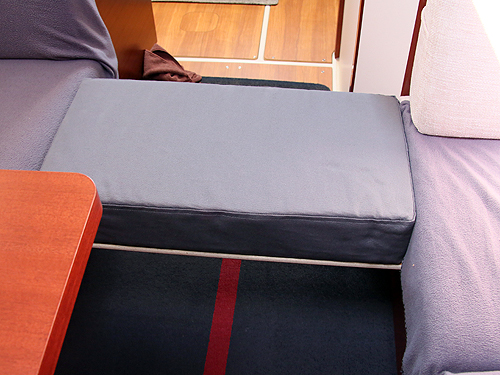 19. The cushion in place. It will stay in place due to the tight fit as explained in point 17. |
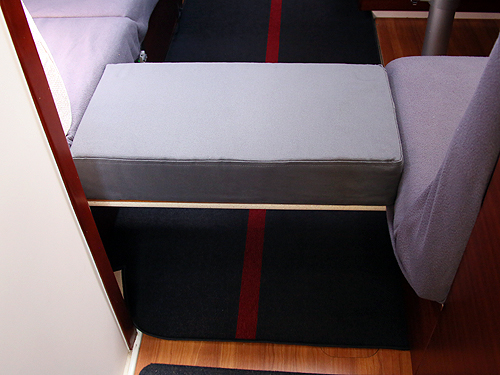 20. The installation looking from the galley side. Perfect when you want to lie down or when you have small kids on board and you need an extra seat. For heavier persons I recommend using bolts and nuts that go through the wooden board to provide additional support.
|
|
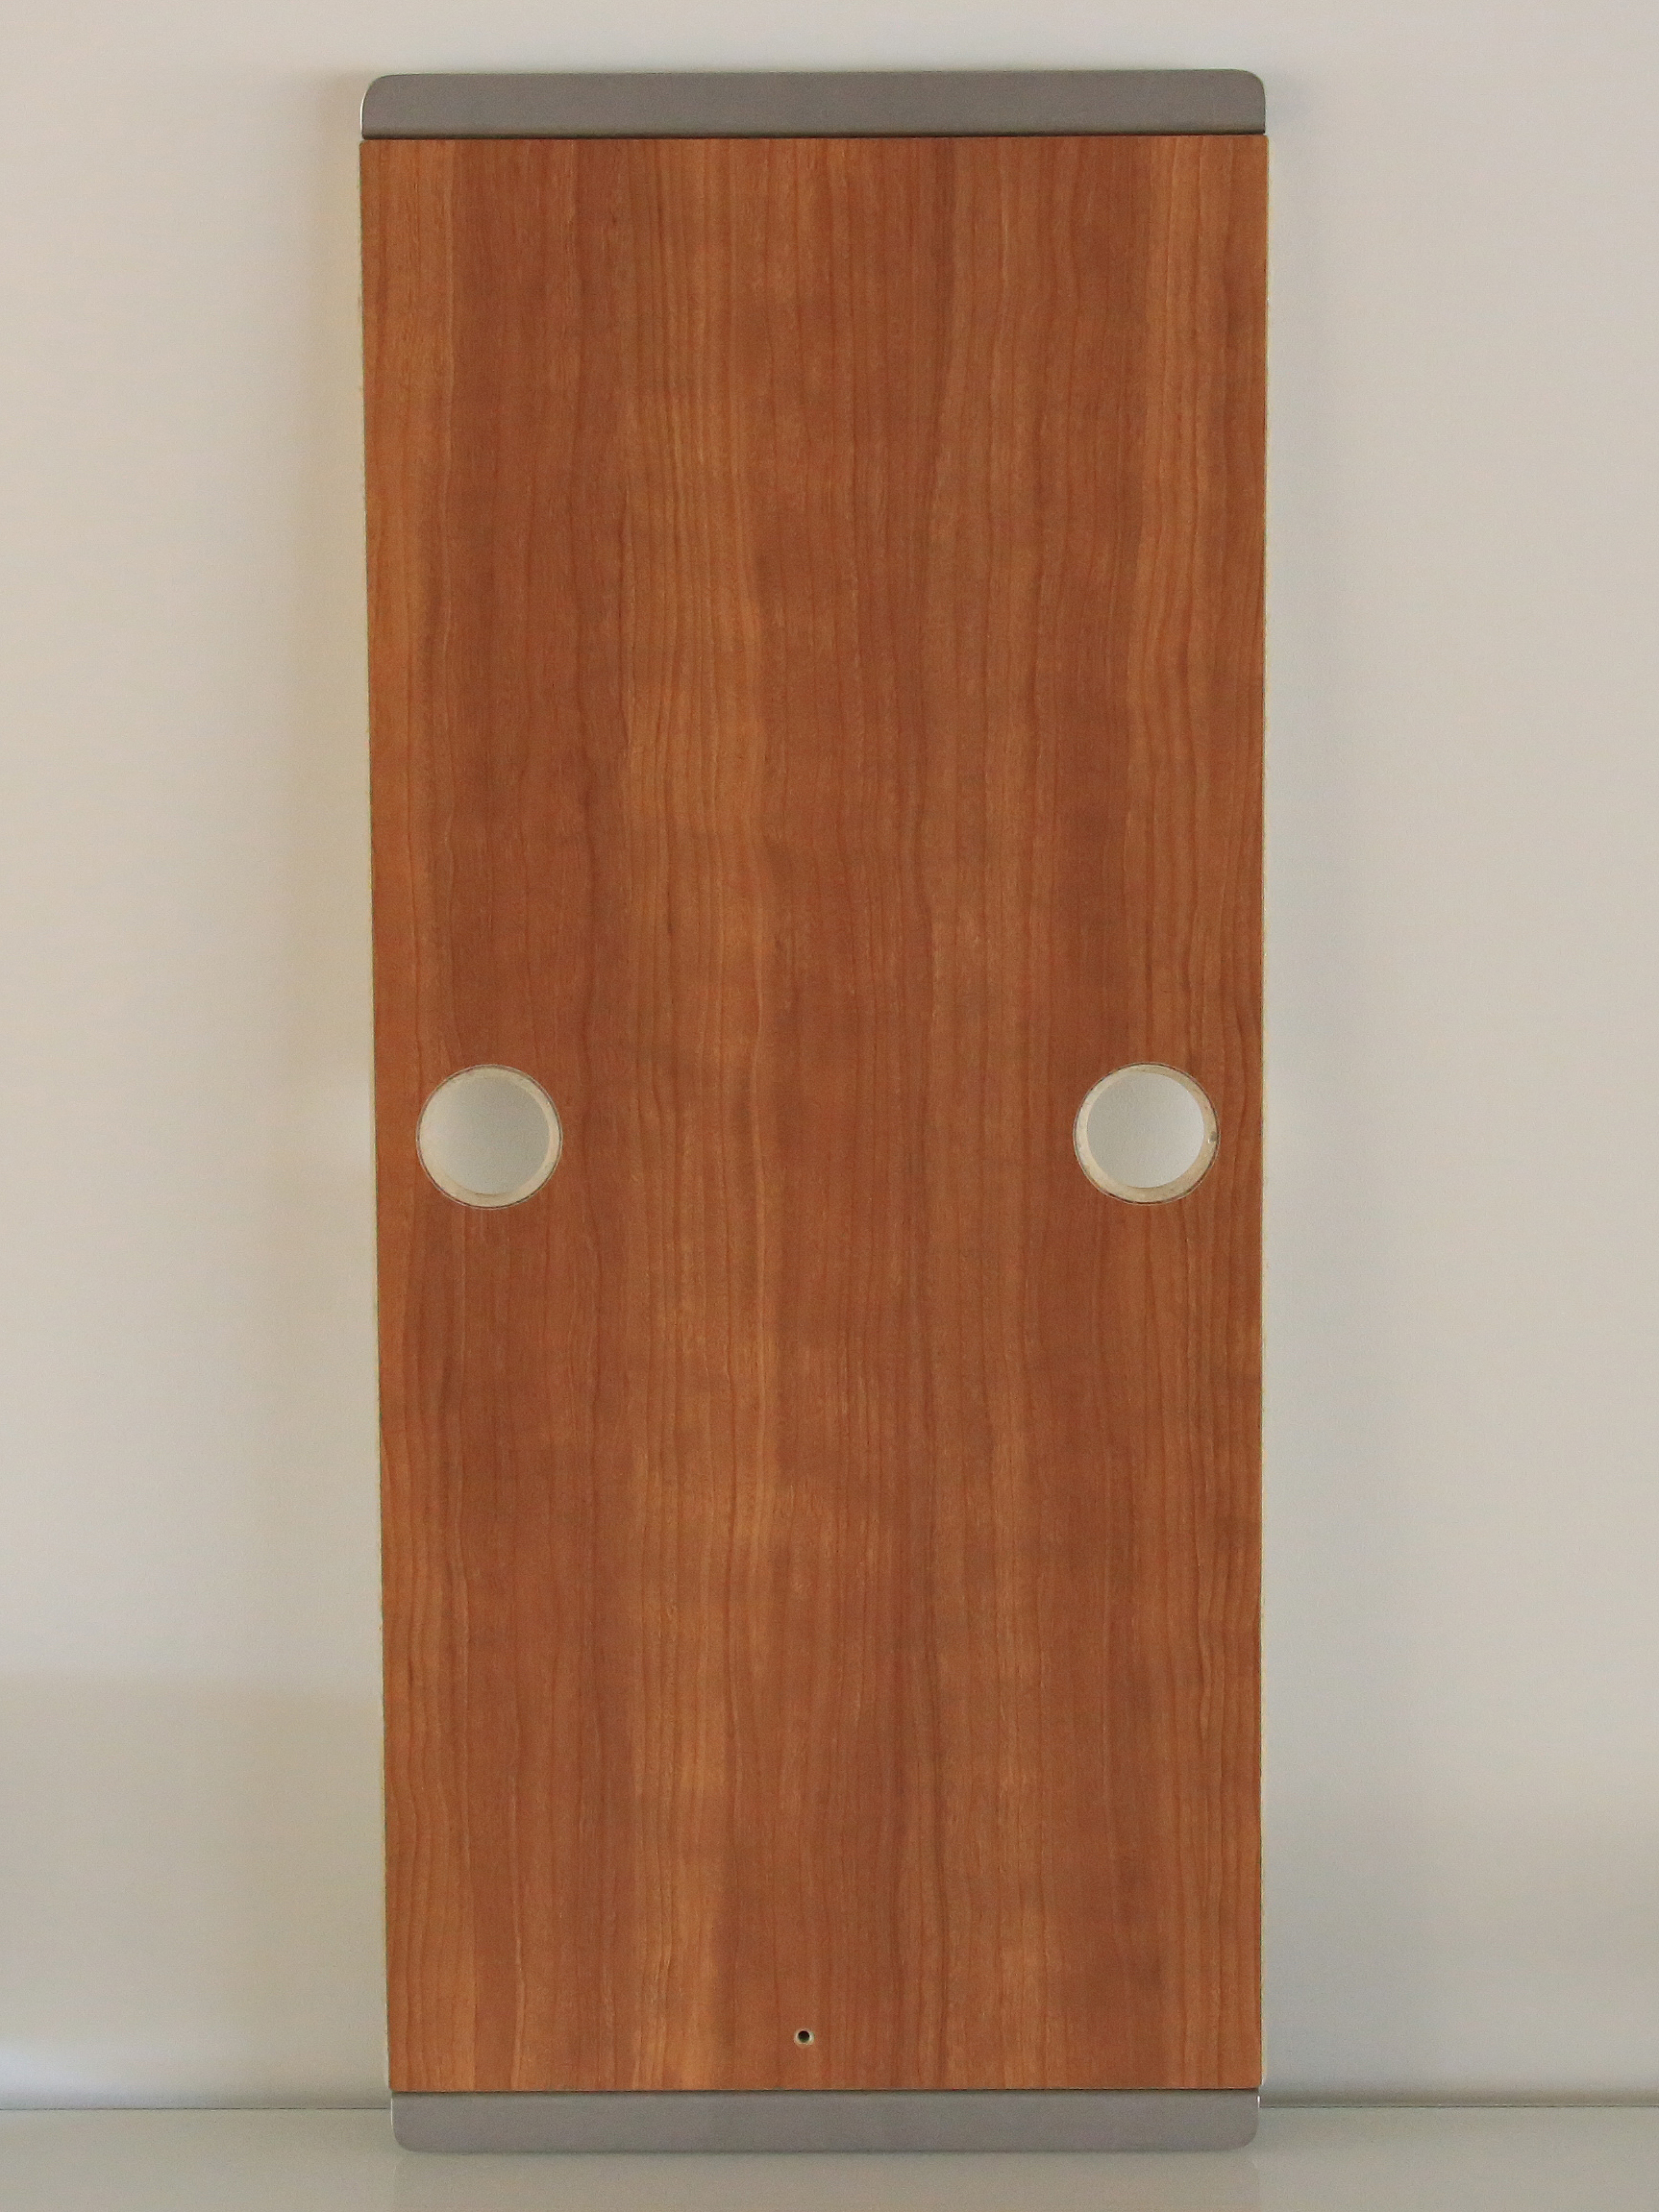 21. The handling of the board showed to be little bit difficult as it was tucked under the front cabin mattress, it was difficult to lift and get hold of so in 2015 we decided to drill couple of holes in it. Now it works perfect when carrying the board around in the boat and putting it in its place. |

22. Close up of the holes that are rounded around the edges with a router. |