![]()
|
Fixing the Yanmar SD50 oil
seals 2020-10-26 Due to some confusion with water in the lower housing's oil, we had to check the oils seal's if they were leaking. Later on we realized that there was actually no water in the oil but the first oil seal had started to rust. So as we already had disassembled the rear cover, why not change all parts required?!
We recommend you to watch the videos below on Youtube before you start working with the
clutch as the films gives you a better visual description for some parts
of our text's ahead.
How to refurbish the drive shaft:
https://m.facebook.com/groups/segelbatsfix/permalink/1122031068242953/ |
|||||||||||||||||||||
You will need few new Yanmar spare parts for the oil seal change. We bought in 2020-10-19
all our spare part from
www.marinshopen.se in Sweden who, according to Yanmar Sweden is
their best spare parts provider in greater Stockholm area. Below is the list of all
the spareparts be bought.
|
|||||||||||||||||||||
| The first oils seal was quite easy to remove by using a rubber
mallet and oak stick. The white back up rings was even easier to remove but
the last oil seal gave us a a really though match. The oil sela had
rusted and was stuck as it was welded. We tried with various oils and
lubricants but it did not move an inch/mm.
|
|||||||||||||||||||||
 1. Start by removing the zink sacrificial anode |
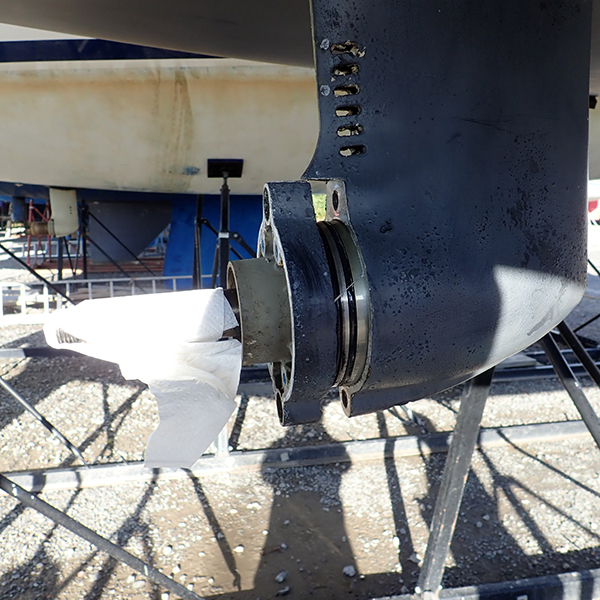
2. Cover the propeller shaft with something if
its covered by oil. Use the propeller
shaft to pull out the rear cover. |
||||||||||||||||||||
 3. The rear cover with its two o-rings. Starboard view. |
 4. Port side view of the rear cover and its o-rings. |
||||||||||||||||||||
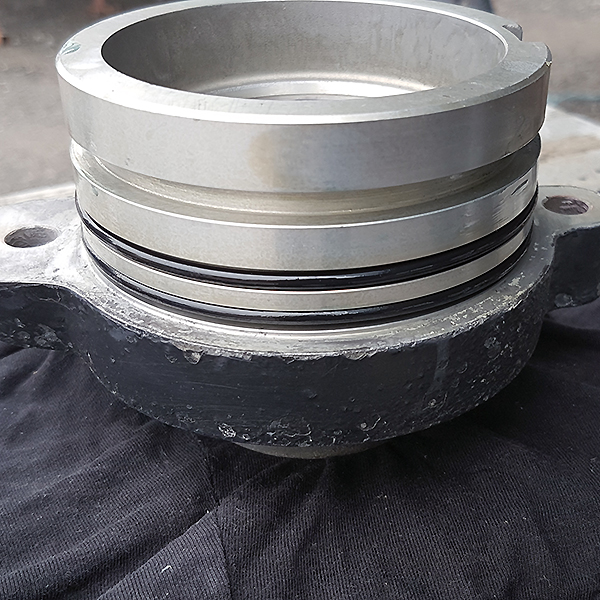
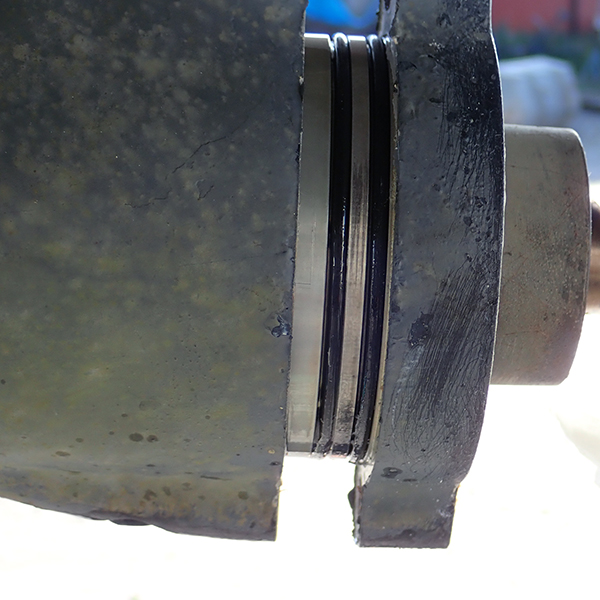 5. Close up of the o-rings. |
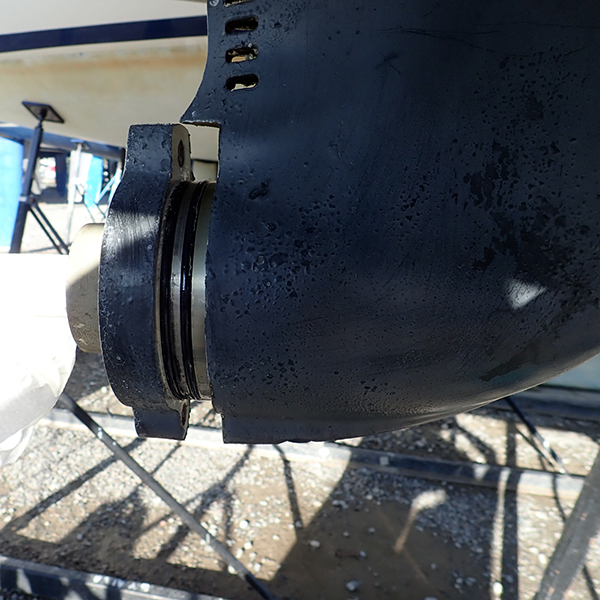
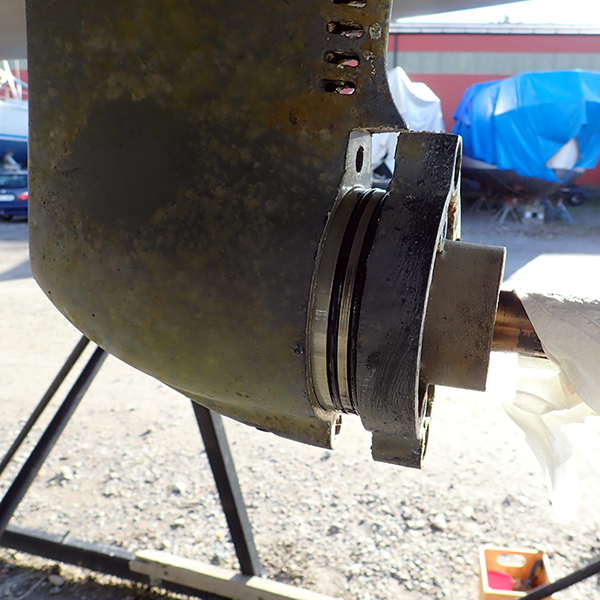
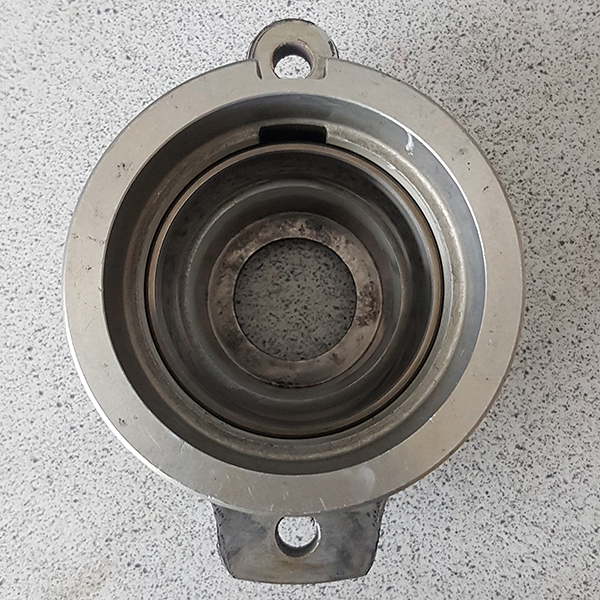
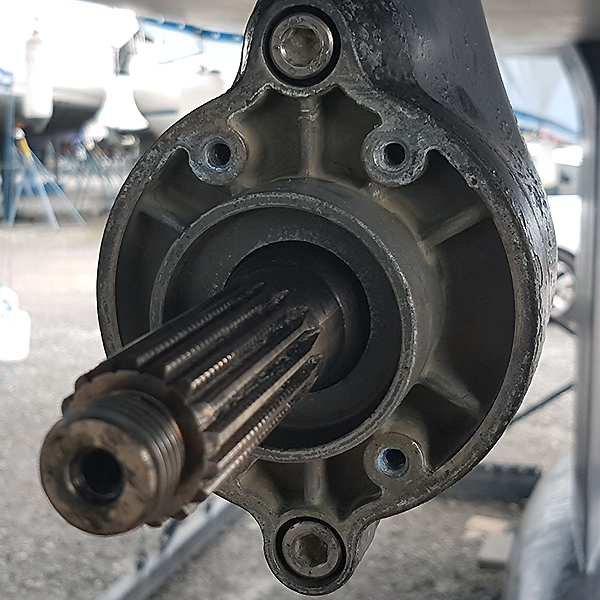
 6. The lower housing after that the rear cover has been removed. |
||||||||||||||||||||
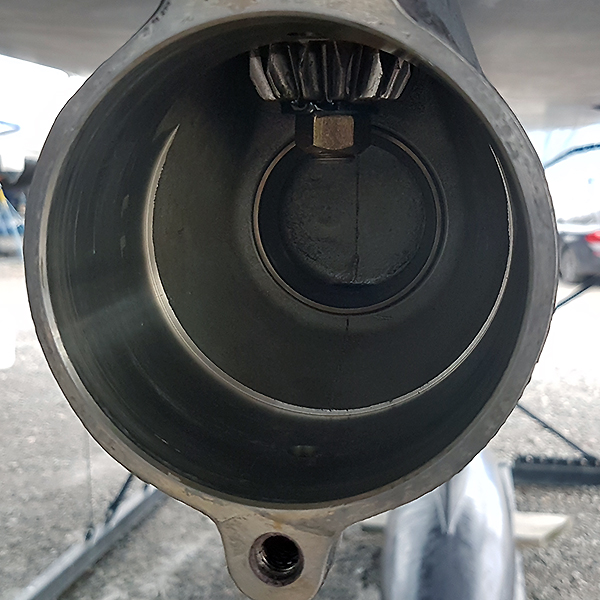
 7. Lower housing from the back of the boat. |
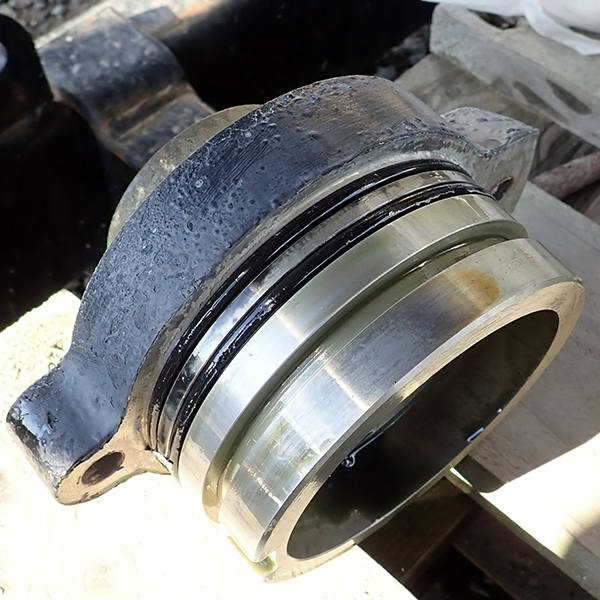 8. Rear cover after removal. |
||||||||||||||||||||
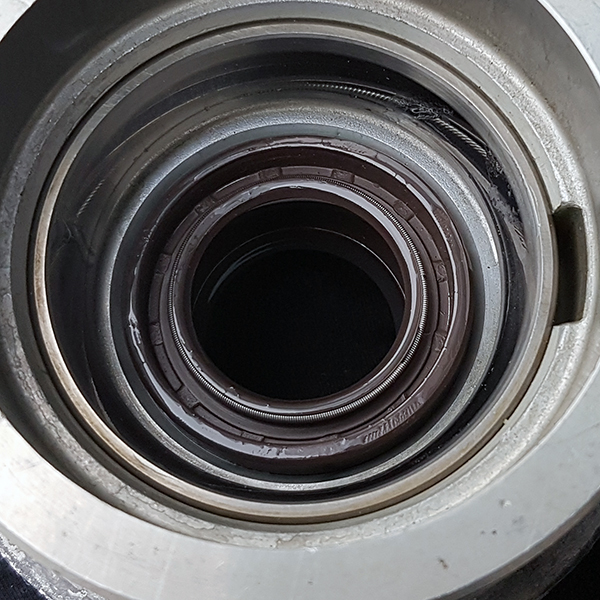
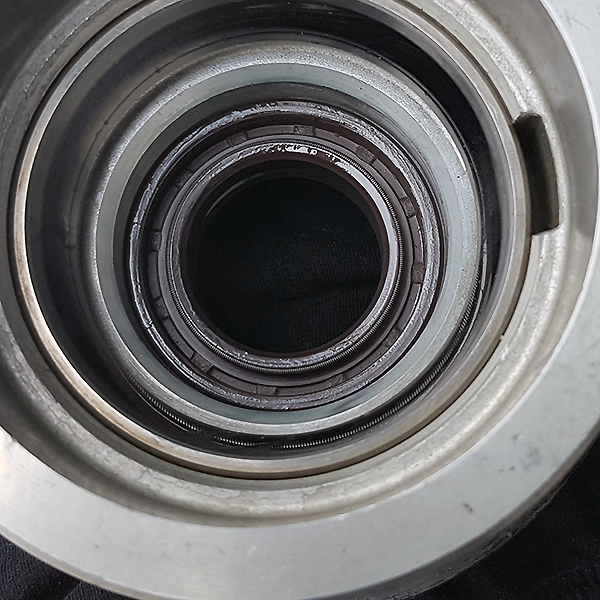
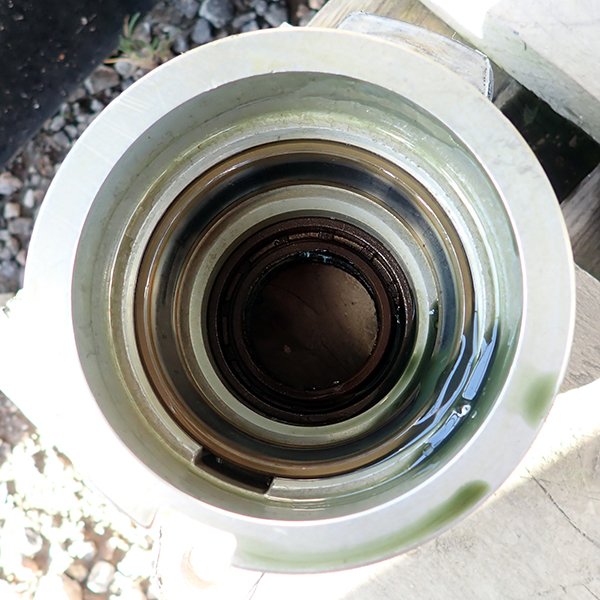 9. The upper oil seal, reffered to as the second oil seal.. |
 10. The lower oil seal and as you can see, its quite worn out. It showed later on that it was completely covered by rust. Still, we did not have any water inside the lower housing. |
||||||||||||||||||||
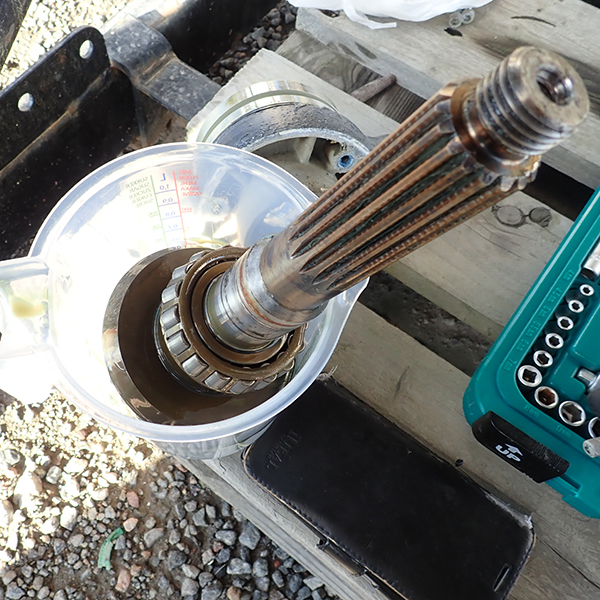 11. Good to have is a bucket or something similar så you can avoid getting dirt on the propeller shaft and its bearings. use a plastic bag to cover it all during transportation. |
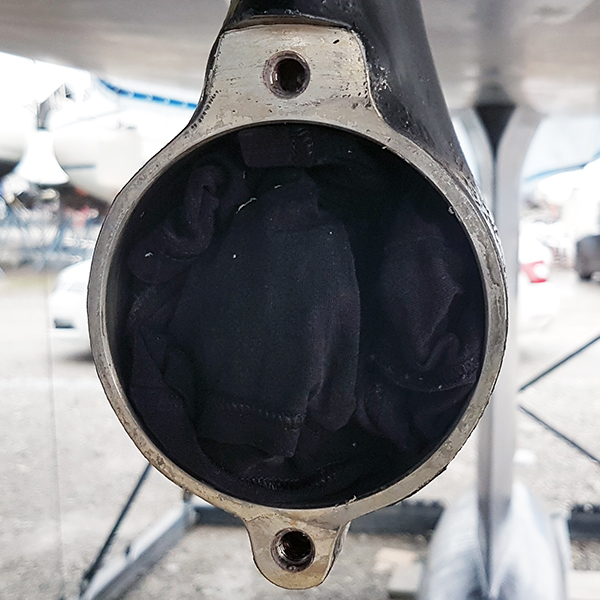 12. Stuff or coefer the lower house with something so you will not get dirt in it if you need to wait for spareparts. We stuffed it first with some old t-shirts so the reamining oil did not drop on the ground. Later on we covered the lower housing with a plastic bag. If you are going to wash the boat before the propeller shaft is re-fitted, you better check that there is no water inside your plastic bag. |
||||||||||||||||||||
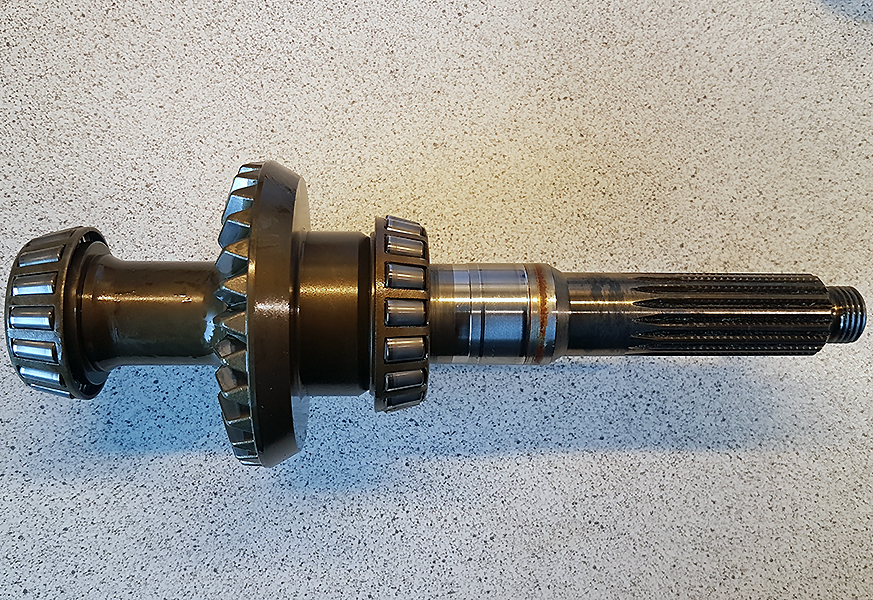
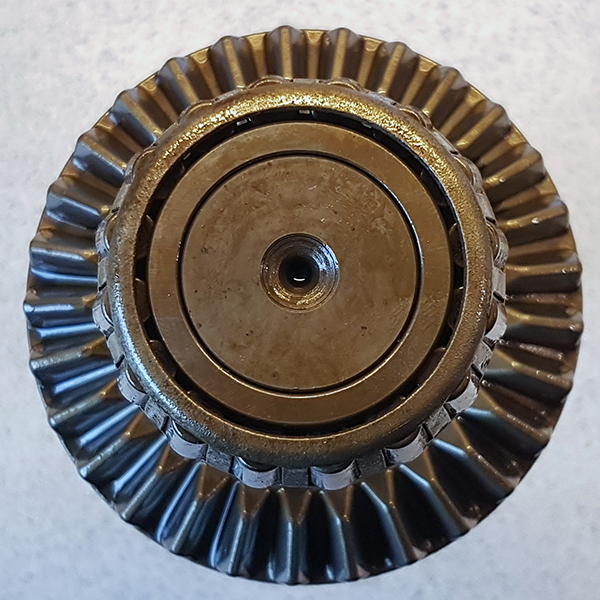
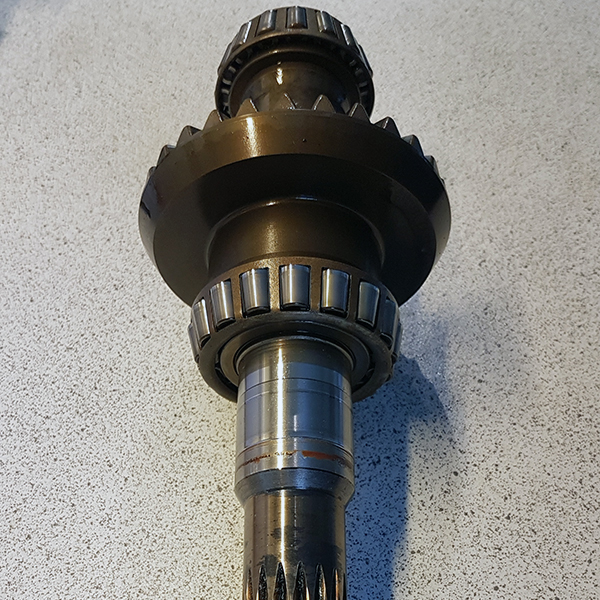
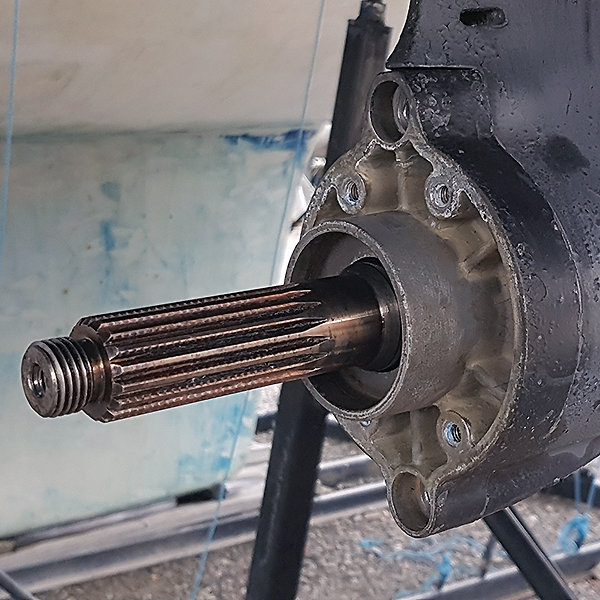
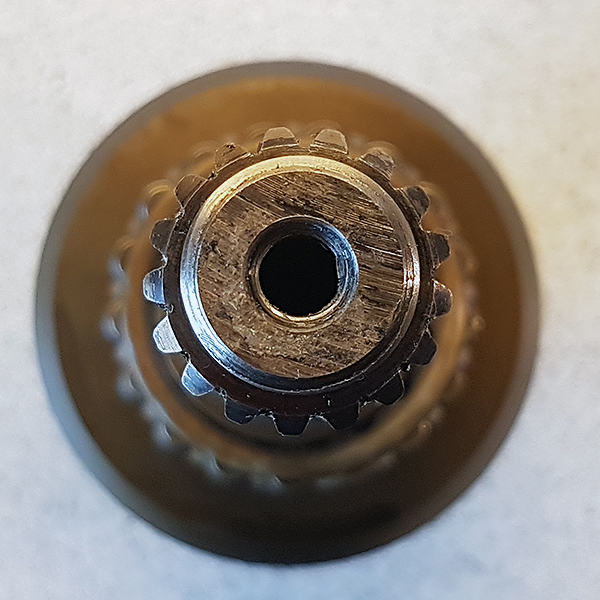 13. View of the propeller shaft from the propeller end. |
 14. View of the propeller shaft from the end that is inside the lower housing. |
||||||||||||||||||||
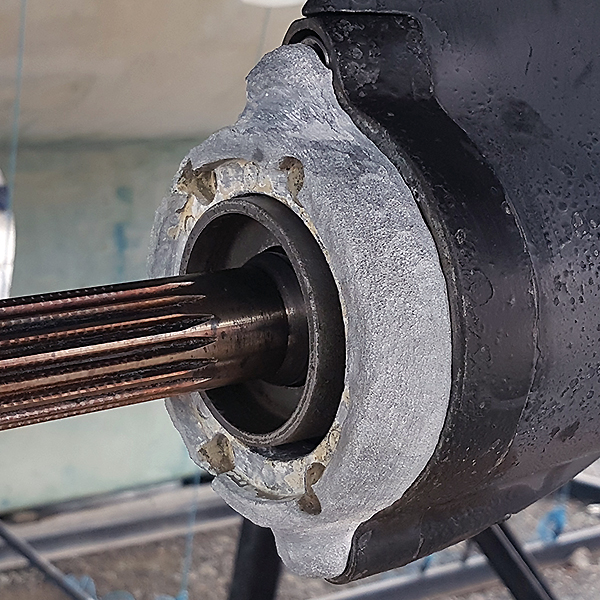
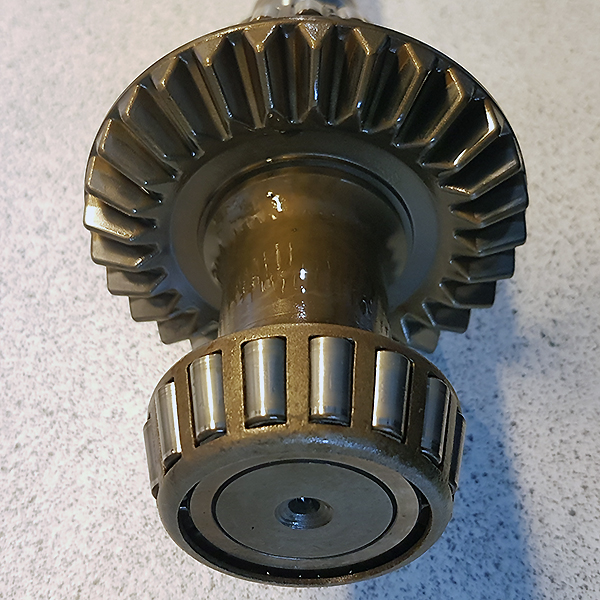 15. Close up of the lower house end of the propeller shaft |
 16. Just another angle of the same as on picture 15. |
||||||||||||||||||||
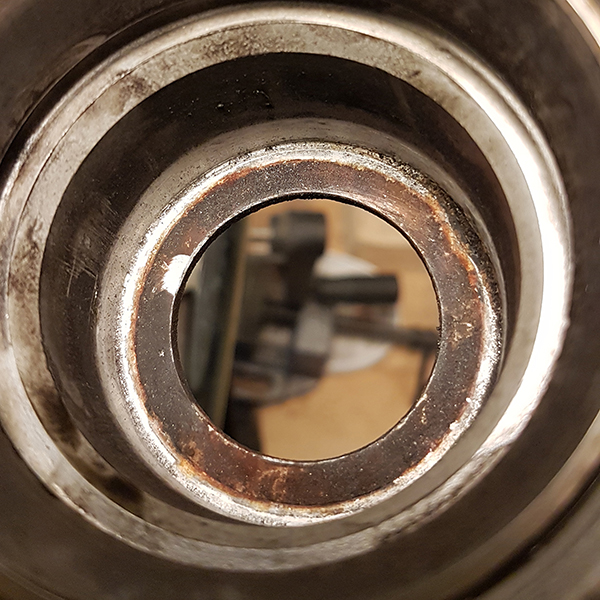
 17. In this picture you can see that the first oil seal had rusted. |
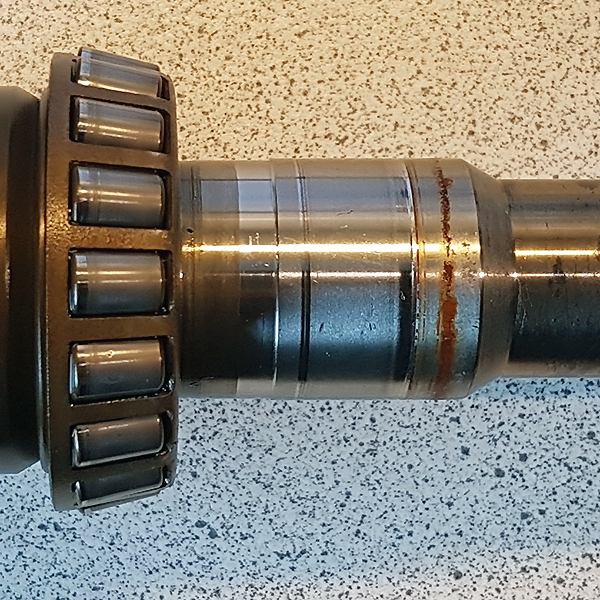 18. Here you can see that the oil seals have worn out the shaft a little bit plus there was rust on the propeller shaft. |
||||||||||||||||||||
|
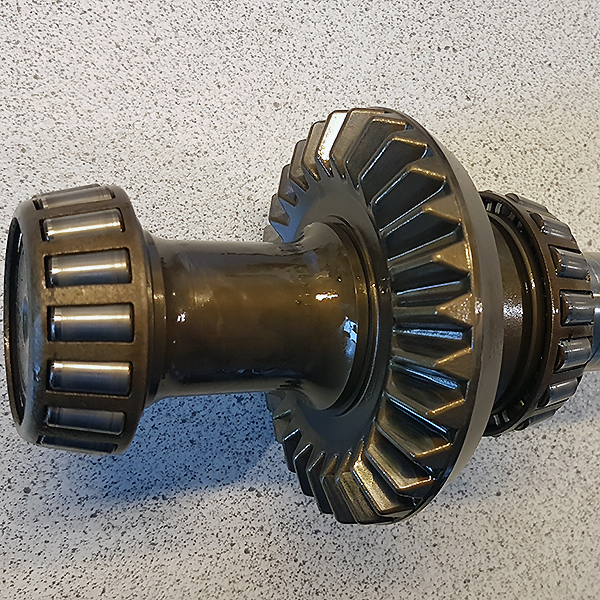
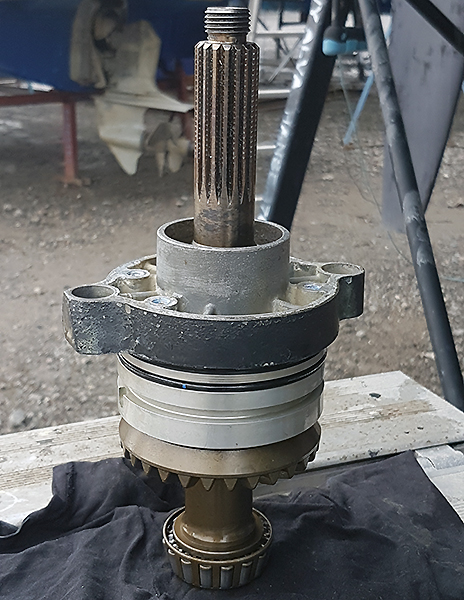
19. A full picture of the propeller shaft Extra: How to refurbish the drive shaft https://m.facebook.com/groups/segelbatsfix/permalink/1122031068242953/
|
|||||||||||||||||||||
| HOW TO REMOVE AN OIL SEAL IF ITS STUCK As the last oil seal (the first one when you add a new one) was so difficult to remove due that it was rusty and we did not like to use too much big scraping tools inside the rear cover we had to find an other solution to the problem. After studying the oils seal we learned that it was basically L-shaped steel ring and due to its construction it needed to be weakend in the places where all the strenght was. This menat that we needed to grind of the "roof" of the upside down L and from there continue to the "back". See animations below |
|||||||||||||||||||||
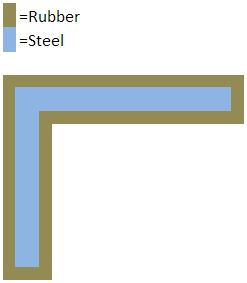
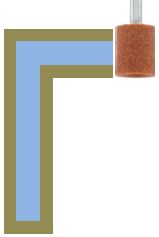
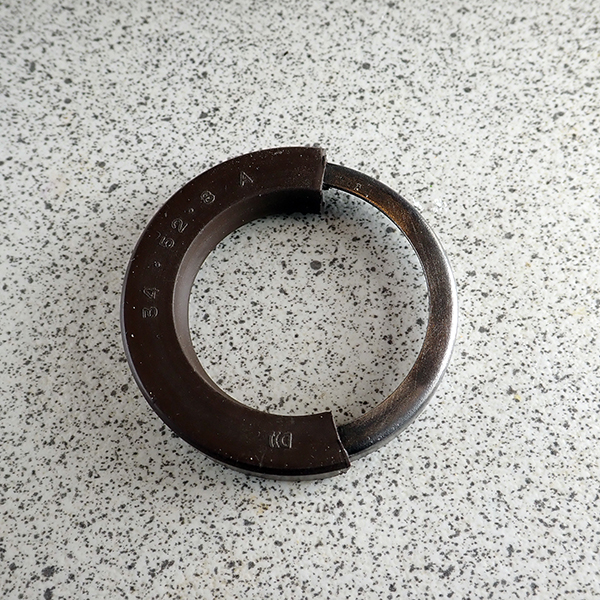
20. This is how the oils seal looks like in profile. Its a
L-shaped
steel ring covered with a brown thin rubber on all directions.
From now on called the L and the top of the profile is called
the "roof". The side of the profile is called now on the
"back wall". |
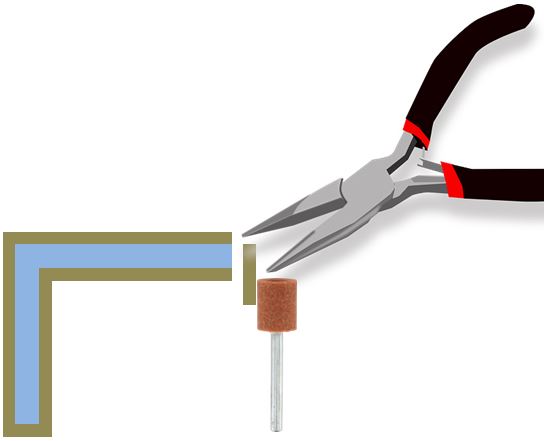
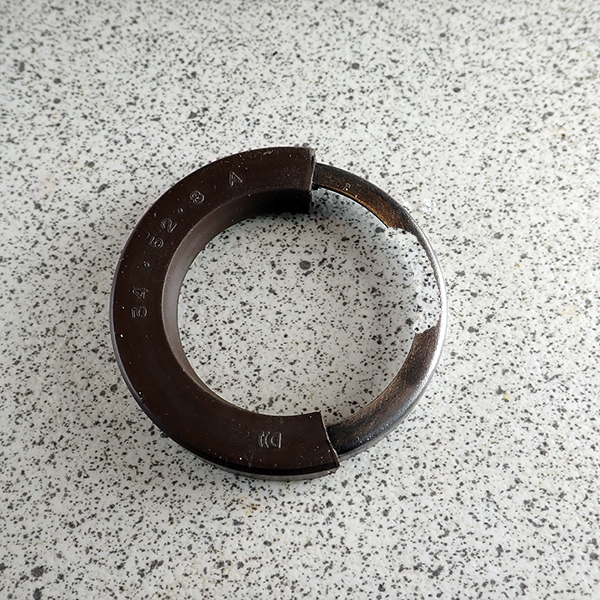
21. Start by removing the rubber from the edge of the
L with pliers
or e.g. a Dremel grinding stone. We used a Dremel grinding stone no. 932,
as in the picture above. |
||||||||||||||||||||
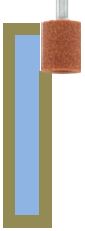
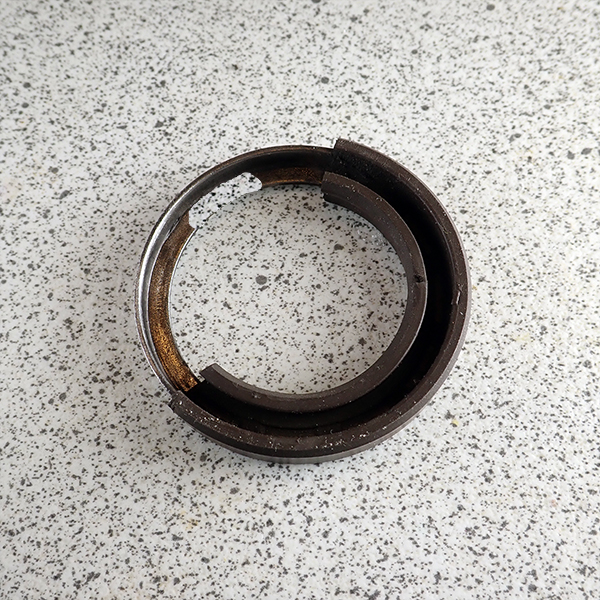
22. When the "roof" was removed from the
upside "L"... |
23. ...we continued to grind off the "back wall" off untill it was so thin that we thought it was now possible to use a screwdriwer and pliers to pry it out from the propeller shaft assembly housing without damaging the surrounding housing. Pretty much basic physics/mechanics logic. |
||||||||||||||||||||
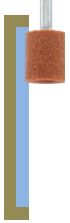
24. This is how the seal looks like inside when
its not rusty and damaged. |
25. Gris off the uppe lip until you reach the
outr reim of the steel frame and continue untill its so thin that you
can prye it with pliers. In this example we have just removed a little
bit of the upper lip with help of Photoshop. |
||||||||||||||||||||

26. View from the underside. |
27. The lip removed ans howing the outer wall
that must be grinded much thinner but not so you damage the housing
behind it. |
||||||||||||||||||||
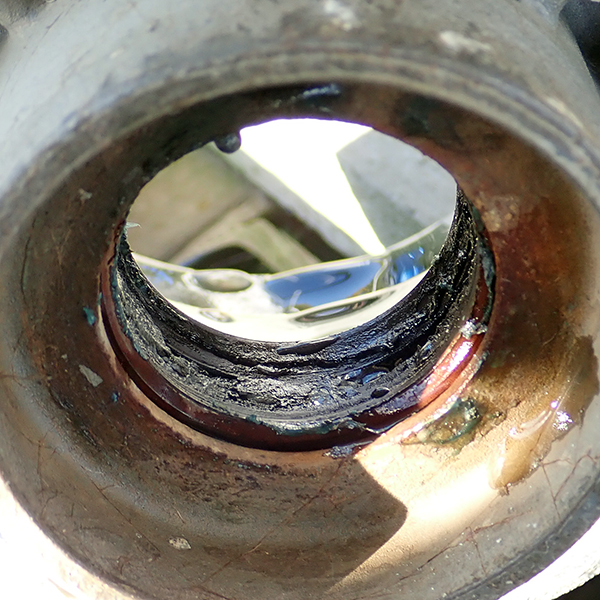
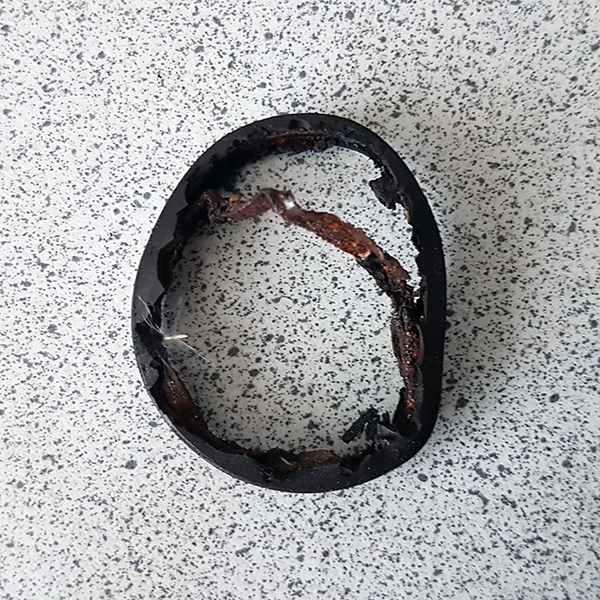 28. This is how the second (from the top) oil seal looked after some good time of trying to find a way how to remove it. |
|||||||||||||||||||||
29. This is how the bottom of the housing looked like after the oil
sela was removed. |
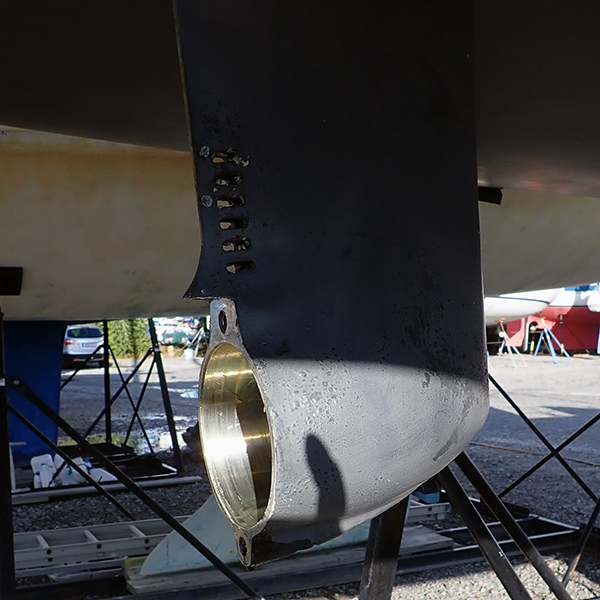
 30. This is how it looks like when the rust has been removed and everything has been washed and dried. |
||||||||||||||||||||
 31. This is how the propeller shaft assembly housing looks when everyhing has been cleaned up from rust, paint and other dirt that was on the top of the housing and betweend the main axis housing.. |
 32. M10 Allen bolst cleaned up from Locktite. |
||||||||||||||||||||
|
33. This is how the first oil seal looke like on the back. |
 34. This is how the first oil seal looked like on the front. |
||||||||||||||||||||
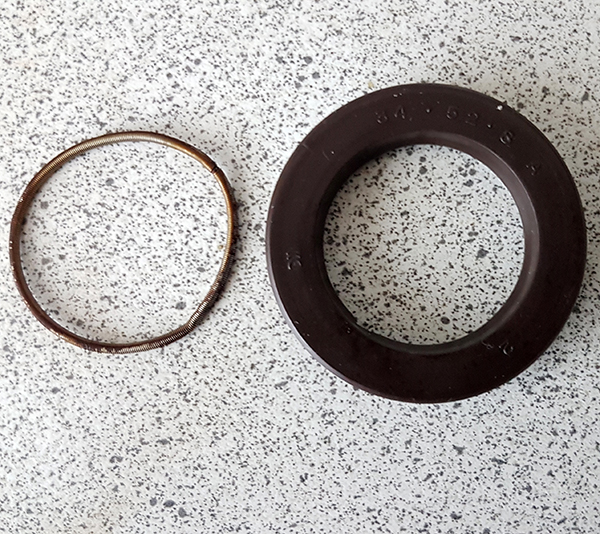
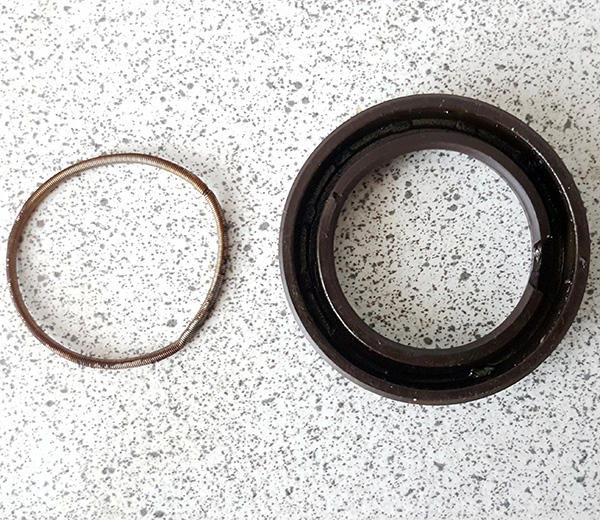
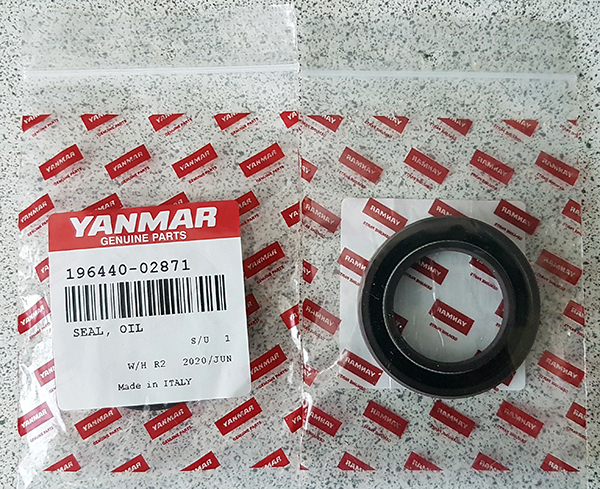 35. New oil seals, product number 196440-02871. |
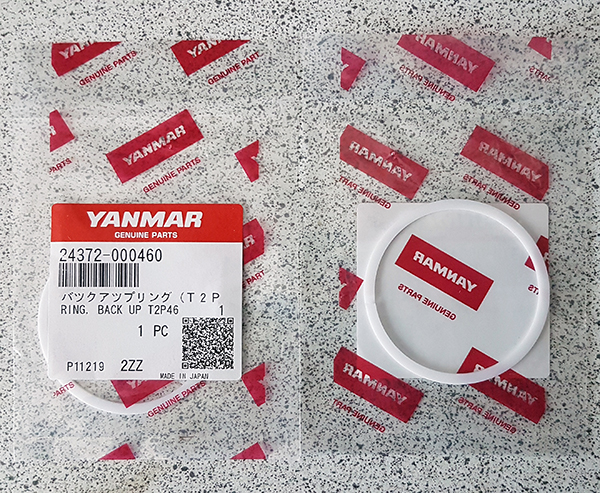 36. New back up rings, product number 24372-000460. |
||||||||||||||||||||
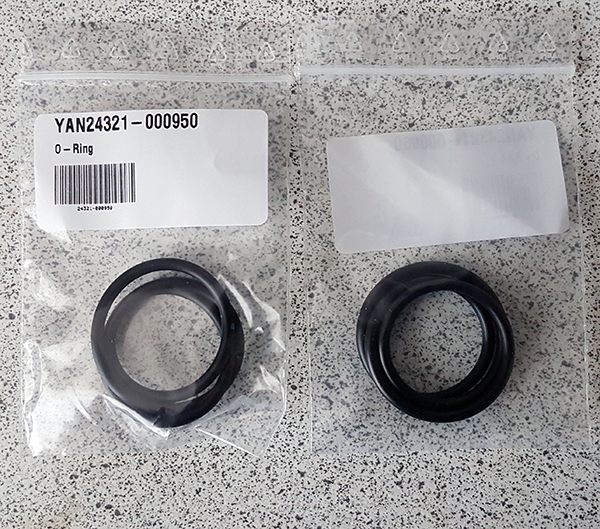 37. New o-rings for the rear cover, product number 24321-000950. |
|||||||||||||||||||||
|
38. Remove what ever you used to keep the dirt outside the lower housing. |
 39. Start by giving the first oil seal a decent cover of gear lube as this will make the re-fitting much more easier. Remember, the flat side must be up! |
||||||||||||||||||||
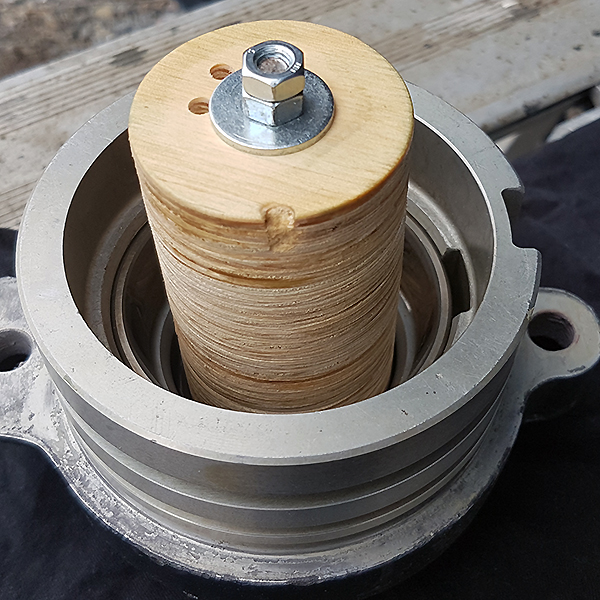
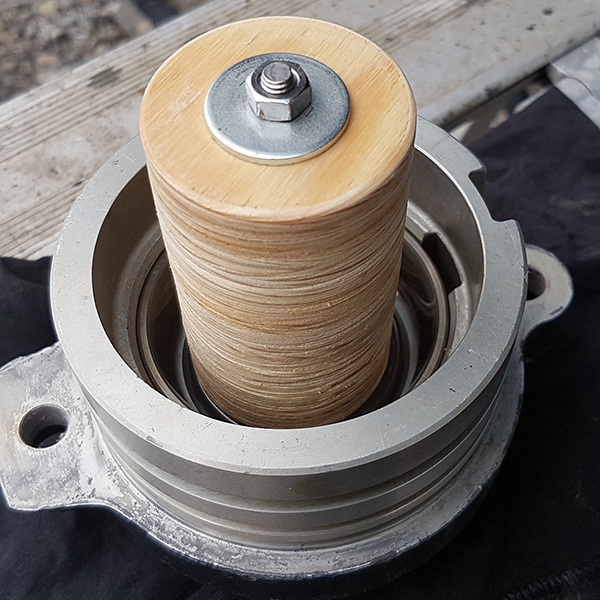 40. We made a home made tool to give the oil seal an equal pressure when pressing it down in its position. You dont really need this tool as long as the oil seal is properly covered with oil. But it was fun to make a special tool. |
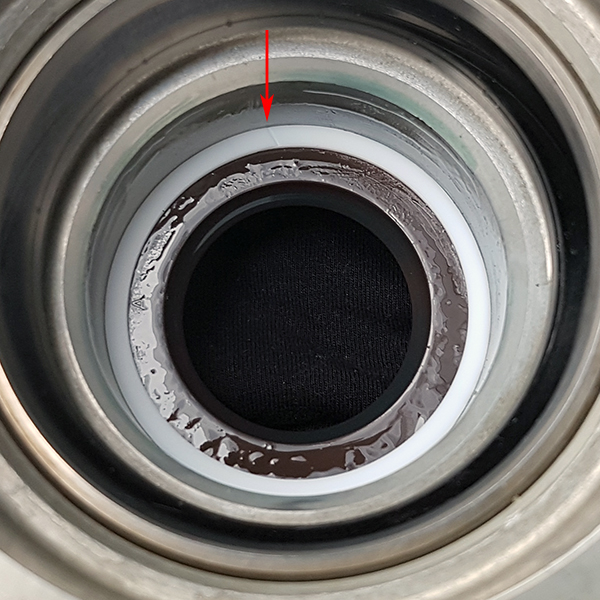 41. When the first oil seal is it in its place its time to fit the first white Delrin plastic ring. The red arrow is marking where the opening is on the ring. |
||||||||||||||||||||
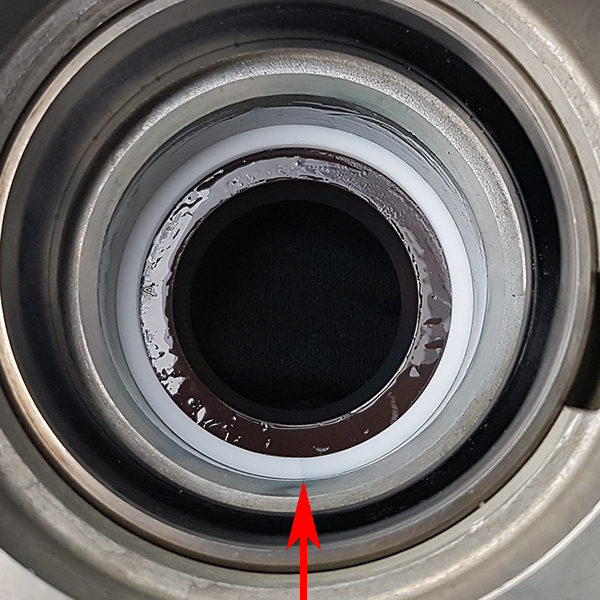 42. The second white ring is fitted in its place. Observe that the cut is on the opposite side. |
 43. The second oil seal has been lubricated around the edges and its time to push it in its place. Remember this time to check that the side with a groow is upwards. I.e. flats side down! |
||||||||||||||||||||
 44. A littlel help fromthe special tool and down goes the oil seal! |
 45. You see? It's down in the bottom. |
||||||||||||||||||||
 46. Take the two o-rings and give thema nice treatment of gear lube in order to avoid the getting damaged when you put the rear cover in its place. |
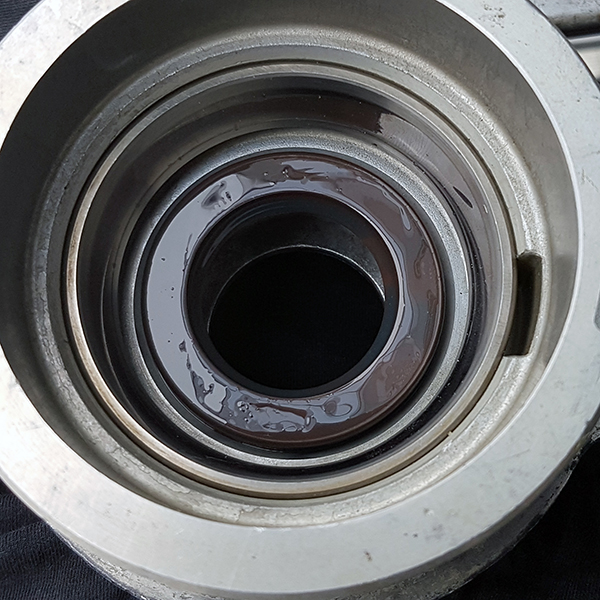
 47. Checka last time that the lower housing is clean. |
||||||||||||||||||||
 48. Fit the rear cover over the propeller shaft and lift it in its place by holding on to the propeller shaft. Make a last check that there is no dirt on the bearings etc. |
 49. Start by holding on to the propeller shaft. Push it in as far as you can and twist it at the same time so it fits in the cog wheel from the upper house. Do not yet push the rear cover in its place. When you feel that there is some resistance when you turn the propeller shaft its time to push in the rear cover gently as possible. Assure that the o-rings are in their place when doing so. |
||||||||||||||||||||
 50. Adjust the holes for the allen bolts, dry fit the bolts so you are 100% sure that the rear house is in its correct position. When you are done, its time to remove the bolts and add some Loctite on them. |
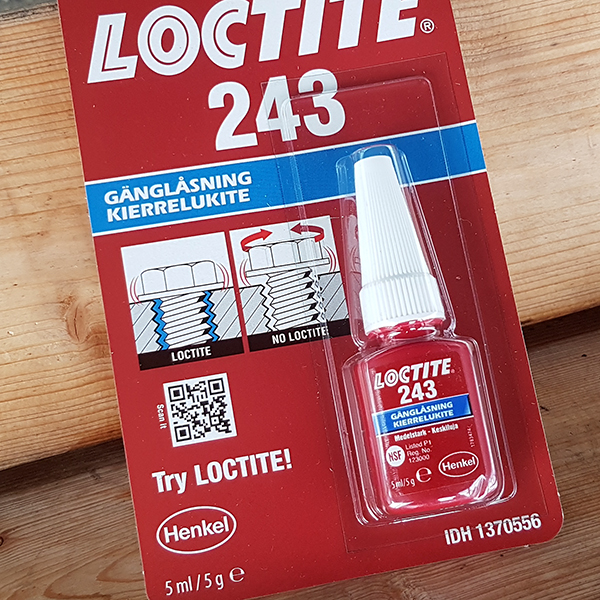 51. We used Loctite 243 which is medium hard and removable. Recommended by Henkels customer support. |
||||||||||||||||||||
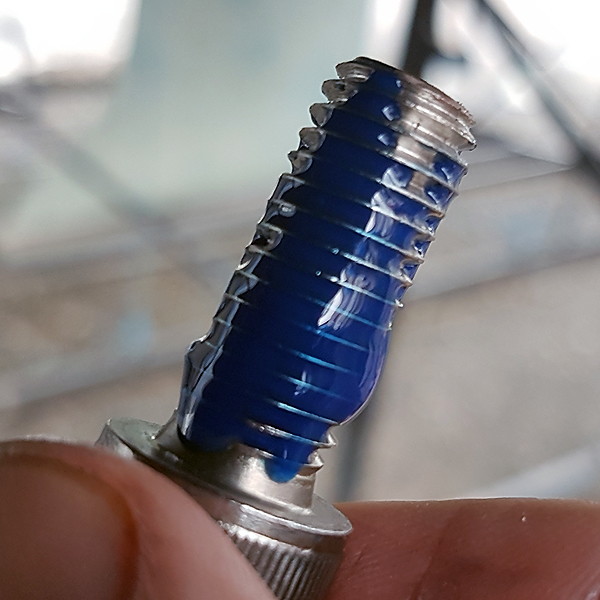 52. Normally we go easy with Loctite but since we are talking about the propeller we gave the bolts a extra treatment and covered all threads from top to toe with Loctite. |
 53. The sacrificial anode in its place. This one will do one more season! |
||||||||||||||||||||
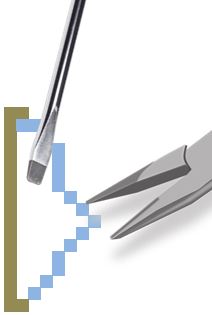
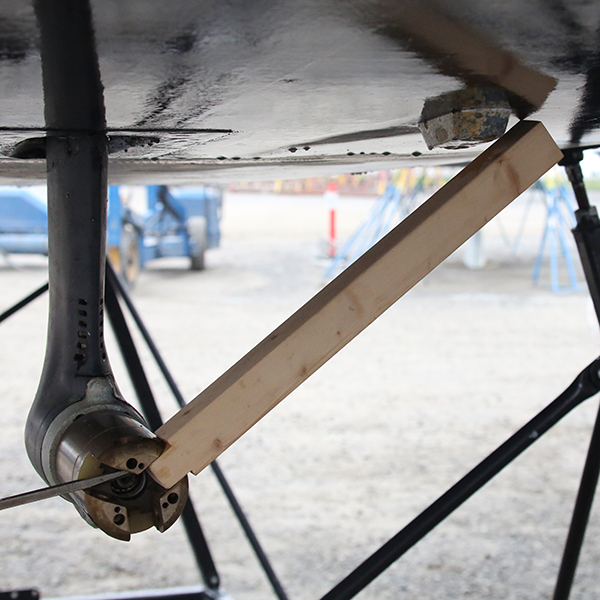 54. This is a handy tool that we use when we need to remove the propeller. Either you have one person more to hold the stick or you can put it against the hull if you are alone. The screwdriver is only there as leverage holding the stick in upward position during the photo shoot. |
 55. Cloes up of the stick. |
||||||||||||||||||||